

Table of Contents
Overview
I have the domain name “theitguycj.com” registered with Namecheap. I want to continue using them but I don’t want to have to log into yet another console to add A or CNAME records to point a domain name (like awsproject.theitguycj.com) to an AWS project especially when AWS has a DNS solution. So we’ll create the subdomain “aws.theitguycj.com” in Namecheap for Amazon Route 53 to control. Now I can host projects using a domain like project1.aws.theitguycj.com. This Route 53 project assumes you already have a domain with a registrar that you want to use. This process will not be necessary if you buy a domain name through Route 53.
Amazon Route 53 hosted zone setup
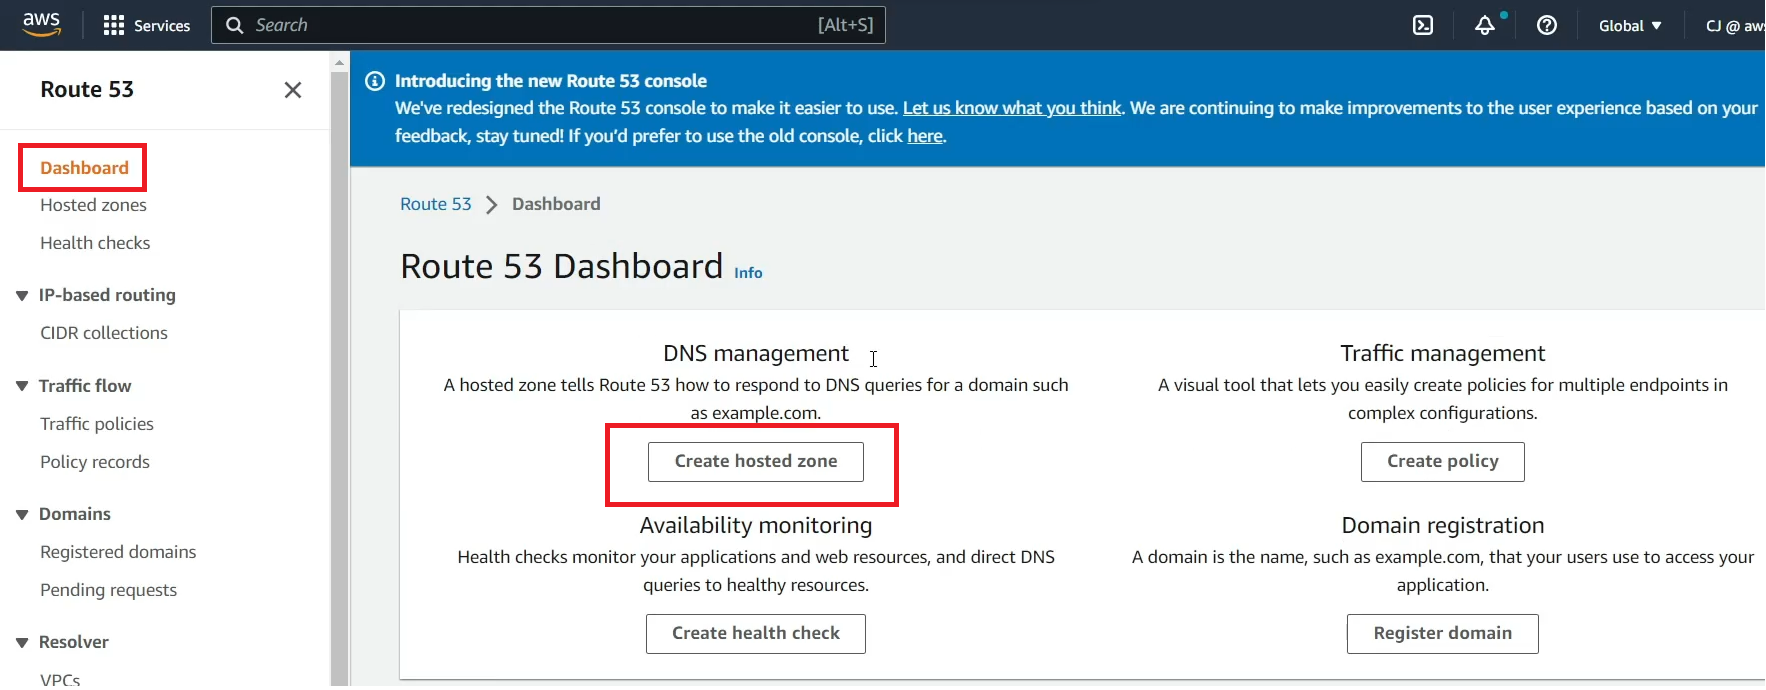
- Sign into your AWS account and search for the Route 53 service.
- Click “Dashboard” on the left pane and under DNS management, click “Create hosted zone”. Please note: the cost is $0.50/month per hosted zone.
- In the Hosted zone configuration:
- Domain name – [USE YOUR DESIRED DOMAIN/SUBDOMAIN]
- Description – [WHATEVER YOU LIKE]
- Type – Public (if you want this publicly accessible)
- Press “Create hosted zone”
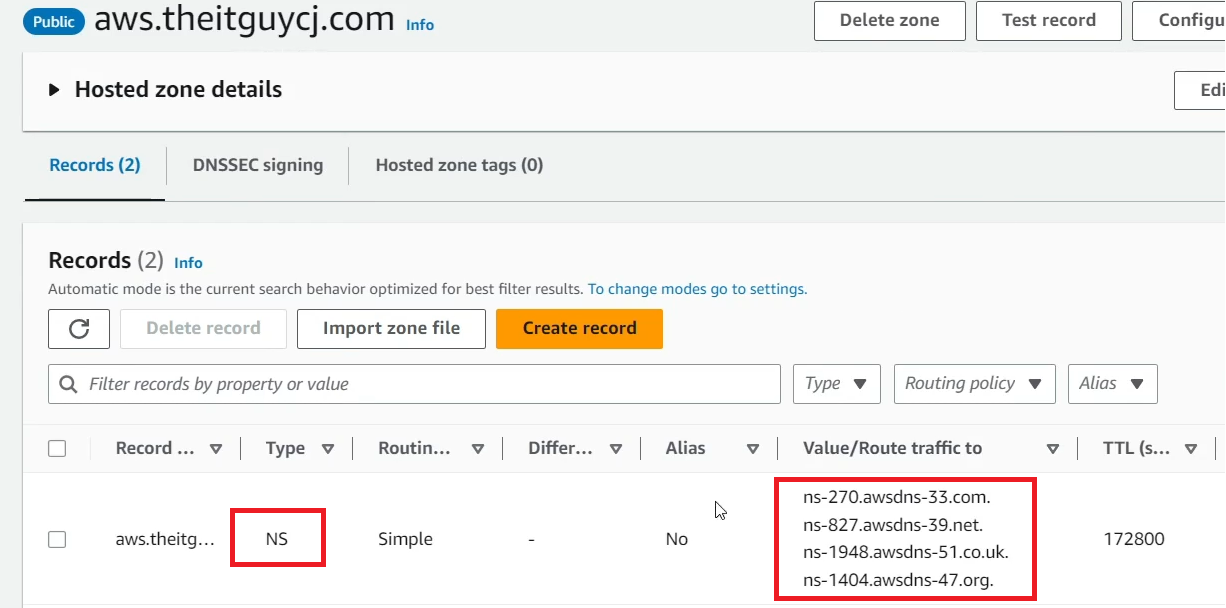
- Copy the 4 name server addresses listed in the row with type “NS”. You’ll need to add those into Namecheap to transfer DNS control to Route 53.
Namecheap name server changes
- Log into your Namecheap account.
- Select your domain in the domain list.
- If you want to use your top-level (primary) domain on AWS, you can change your name servers under the “Domain” tab. If you want to use a subdomain like I did, navigate to the “Advanced DNS” tab.
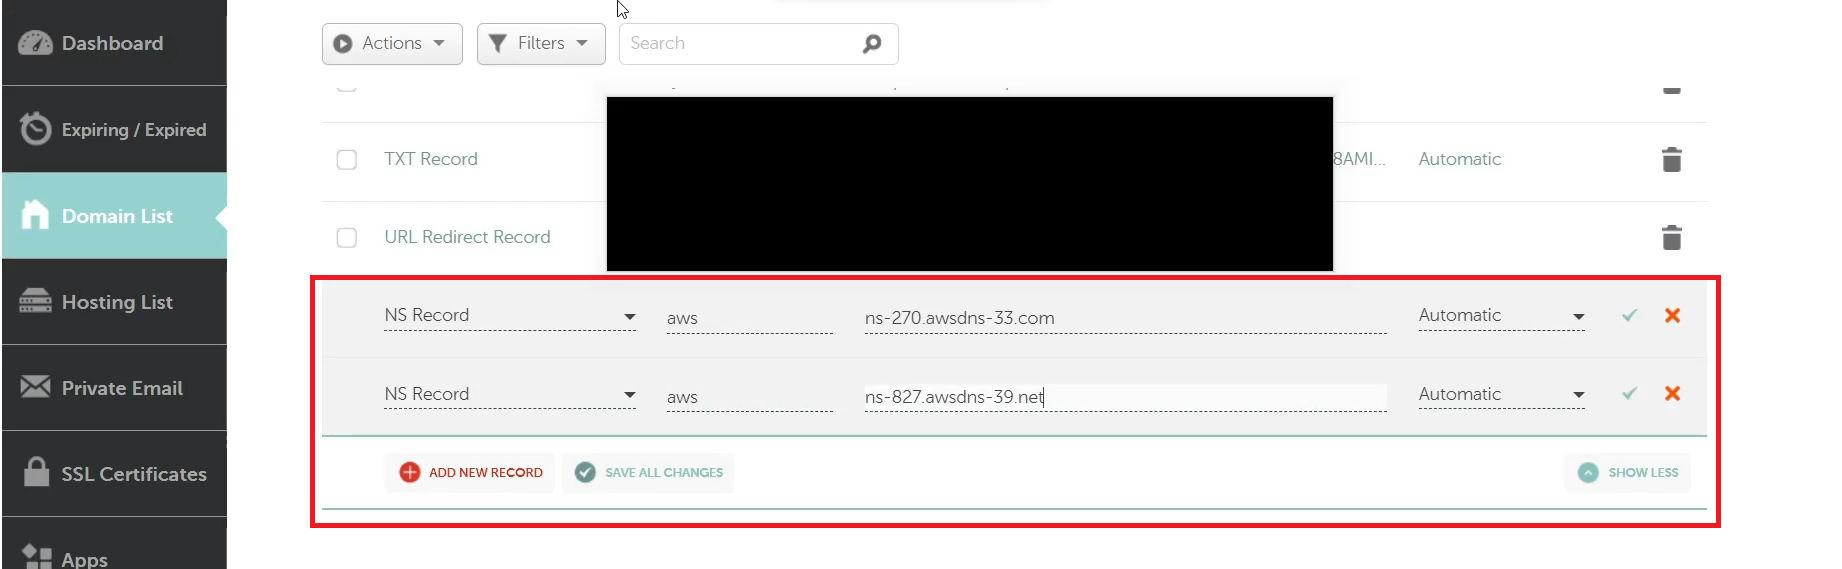
- Under “Host Records”, scroll to the last record and click “ADD NEW RECORD”.
- Type – NS
- Host – [SUBDOMAIN] (don’t type out the whole domain)
- Nameserver – [PASTE THE IP ADDRESS FROM ROUTE 53]
- Keep adding a new NS record to cover all each given Route 53 IP address. My example has 4. Click “SAVE ALL CHANGES” right below that when done.
Testing changes
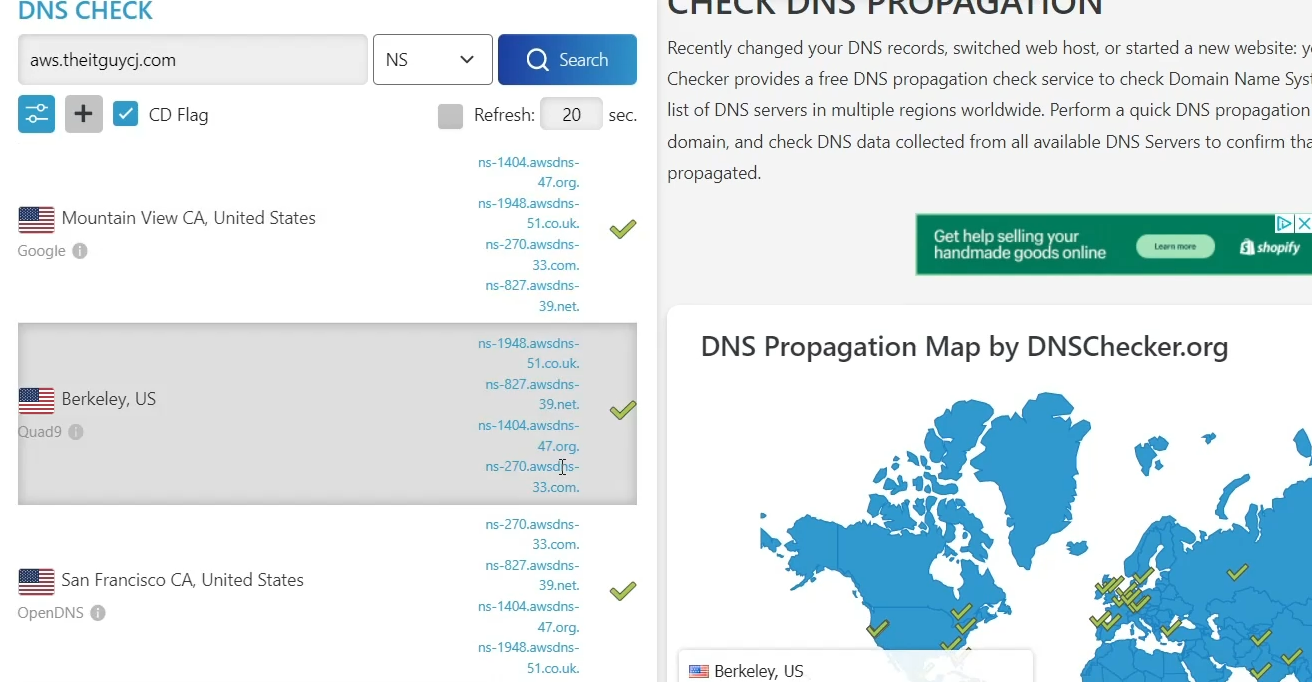
- It can take up to 48 hours for DNS to fully propagate but usually it only takes a few minutes. Let’s check it.
- Go to dnschecker.org to verify that all DNS providers have received the new info.
- Put in your full domain name that Route 53 will use. Change the record type to “NS” then search.
- Now you can solely use Route 53 for DNS entries for your AWS services.